
Think about all the "public" surfaces you touch on your way to work – railings, door handles, coins and tokens, cash machines, elevator buttons and more. Then, when you get to your destination, washing your hands probably isn't the first thing you do. Instead, you probably grab a cup of coffee and turn on your computer. If you power up before you clean up, all the germs and bacteria that commuted with you are transferred from your hands to your workstation. Ugh! And then, if someone else sits down at your computer, you've got all the germs that tagged along with them, too.
Computer and Electronics Cleaning
Before you begin, be sure the computer is off before you clean any part of it – keyboard, monitor screen, mouse, printer or housings. Also, never spray cleaner directly onto any part of the computer. Spray it onto a cloth, and then gently wipe.
- Keyboard: Clean the keys with a cleaning wipe or a cloth sprayed with an all-purpose cleaner. Be sure the keyboard is completely dry before reconnecting it or turning on the computer. To remove the dirt, dust and other debris that gets caught between the keys, turn it upside down and shake gently to dislodge the particles. An air duster is also a great aid in removing all these bits and pieces that get lodged inside the keyboard.
- Mouse:
- Daily Clean - Most of us use our computers every day, so we're constantly handling that mouse, which means that its surface is a breeding ground for all sorts of germs. A good habit, particularly in cold and flu season, is to give the mouse's surface a daily cleaning. Spray a bit of antibacterial cleaner on a soft cloth or use an antibacterial wipe and gently clean the surface of the mouse. If you turn off your home or work computer overnight, make it a habit to clean the mouse before powering up in the morning.
- Deep Clean – Debris on the underside can affect the performance. If you have an optical mouse (beam of light to track movement), dampen a cotton swab with rubbing alcohol, use your fingertips to remove any excess moisture from the bud, and then gently clean the area where the LED and the lens are located. Using a dry cotton swab, gently wipe over the area to make sure it's dry. For a ball mouse (with a roller on the bottom), you may need to disassemble and clean with a microfiber cleaning cloth, making sure to remove all dust, hair and other debris. Follow the manufacturer’s instructions. If necessary, use a few shots of compressed gas to remove stubborn lint from the inside of the mouse.
- Mouse Pad: What's the point of cleaning the mouse if it's still picking up debris from a dirty mouse pad? Gently clean the pad, using a cloth dampened with an antibacterial spray cleaner. Let it dry thoroughly before setting the mouse back down on the pad.
- Monitor: Use a microfiber cloth, either dry or dampened with clean water, or a product specially formulated for computer screens. If you use anything else, you run the risk of damaging the screen. Check the manufacturer recommendations. Clean the monitor several times a week, as a dirty monitor can cause eyestrain.
- Surrounding surfaces (including computer housings and desktops): Since there are probably coffee and food stains lurking amidst the dust, use an all-purpose cleaner with a disinfectant.
- Printer: Consider how often you push the button on the printer and how seldom you think about cleaning it!
- Telephone: Even if you're the only one using it, it's still transmission central for germs and bacteria that cause ear, nose and eye infections. Clean it daily using a hard-surface disinfectant cleaner or a wipe.
Desk Organization
Start by assembling a few boxes, some trash bags and a magic marker. Label the boxes "Immediate" (as in Immediate Attention Required), "Not Sure," "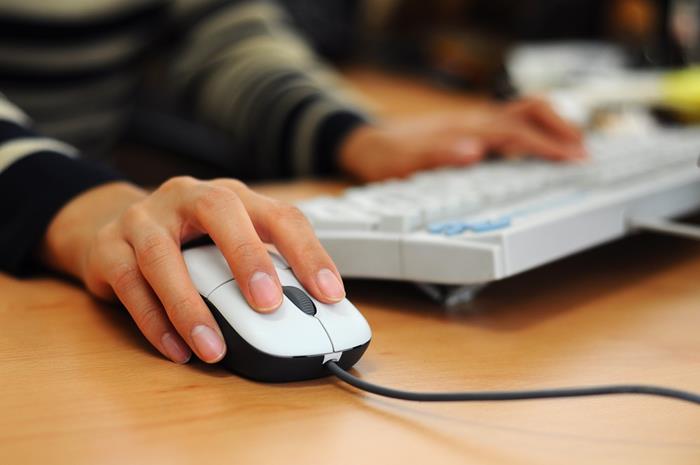 Read," "File," "Recycle" and "Shred." Now you're ready to attack that desk.
Sweep clean: The first order of business is to get everything off the top of the desk that doesn't have anything to do with your desk's basic purpose. Coffee cups, food items, paper napkins and the like should go in the sink or in the trash. Remove framed pictures and other personal mementos, as well as pencil holders, tape dispensers, staplers and other pieces of equipment that litter your desk. Set them aside for later evaluation.
Set aside: Magazines, journals, newspapers, periodicals and catalogs take up valuable space on your desktop. Move them to the "Read" box and deal with them during a separate organizing session or put them in the "Recycle" box.
Sort: As you remove the rest of the items from the top of your desk, deposit them in the appropriate box or trash bag.
Shred: If you have a shredder, use it as you sort to discard papers that contain personal information or anything that would be valuable to an identity thief. If you don't own a shredder, put them in the "Shred" box and make it a priority to have them thoroughly destroyed.
Review: Go back to that "Not Sure" box. Now that you've gone through everything on your desk, you should have a better handle on priorities. Reevaluate what's in this box so that when you're done, the box is empty.
File: Everything in the "File" box should be put in labeled folders and stored in a file drawer.
Clean: Make sure the top of the desk is thoroughly clean before you put anything back on it. Since there are probably coffee stains and food stains lurking amidst the dust, use an all-purpose cleaner with a disinfectant.
Organize: The "Immediate" box should contain items that you're currently working on. Think about the best way to have them handy on the top of your desk. You may need to invest in a desktop storage tower or a tabletop file for easy access.
Evaluate: Take a look at the personal items. Do you really need all those photos and mementos cluttering the top of your desk? Then take a look at the equipment. Is it just a habit to keep the tape dispenser on your desk or do you really use it every day? Would it be better to keep some of these items handy in a drawer?
Reform: Set aside a few minutes at the end of each day to tidy up your desk.
Reducing Clutter
Now that you’ve organized your desk, take some steps to keep it that way! Place a recycling bin or empty box near your workspace for papers, paperboard, and other recyclables (check local codes for "co-mingling"/mixing recyclables). In addition, consider reading on the screen instead of printing or, if you do print, use both sides of the paper (many printers offer this option). It’s more sustainable and fewer pages will mean less clutter to clean down the road.