Make your own mini-book: The Art of Sciences & Bubbles is now available in a downloadable PDF format.
![]()
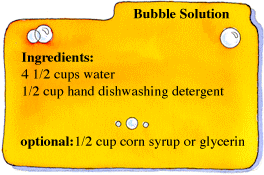 Combine water and detergent.
- Stir well, but do not shake.
- For stronger bubbles, add ½ cup corn syrup or glycerin, or more detergent.
- Experiment with different brands of dishwashing detergent until you find one that works best for you.
HINT: Playing with bubbles can be messy and slippery! Try blowing bubbles outdoors, near the kitchen sink, or in the bathtub! Watch your step so you don’t fall on slippery spills.
![]()
Do you want bigger, better bubbles? Try these bubble tips:
| If you get a lot of small bubbles instead of one big one, you are probably blowing too hard or you have the bubble wand too close to your mouth. | |
| Finish your bubble with a quick twist of your wrist to seal it. | |
| Prepare your bubble solution two to three days in advance. Save any extra bubble solution to use later. | |
| Make sure your bubble maker and anything your bubble may touch is wet. | |
| Let the bubble maker sit in the bubble solution for a few seconds. Don't slosh it around the solution - this creates suds and foam, which are bubble busters! | |
| Look for cool humid days, shady areas. Avoid windy days! |

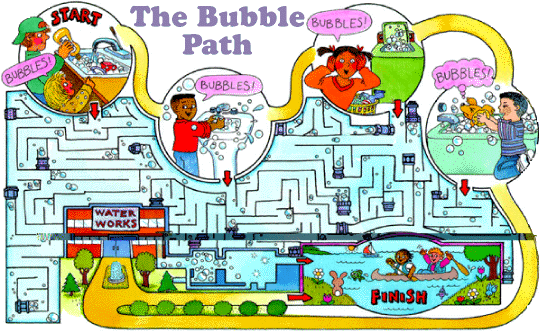
Print out page to play the game.
Bubbles are not only fun, but they also have a job to do.
They help make things around us clean and bright. What happens to the bubble solution
when you’re through with it? Follow the bubbles down the drain to see where bubbles go!
Bubble solutions go down the drain . . . into the wastewater treatment plant where they are broken apart . . .
and then go safely back into the environment.
Become a “Bubble Magician”! Amaze your friends and family with these four fun bubble tricks.
Magician’s advice: Be sure to practice them in advance.
The Disappearing Color
| Add a small amount of yellow and red poster paint or tempera paint to your bubble solution. | |
| Ask your audience what color the bubbles will be. They will probably guess “orange!” | |
|
Now blow bubbles, and watch the multi-colored results. Magician’s advice: Have a white or light-colored wall behind you for best results. |
| Behind the magic: All bubbles are multi-colored because they reflect the light that hits them just like a prism. The thicker the bubble solution, the thicker the bubble wall and, therefore, the more intense the color. |

Show your friends that you are a “pop predictor”!
|
1. Blow a bubble and watch the top of the bubble closely. When a black band begins to form on top of the bubble, announce that it is ready to pop! |
| 2. Give another demonstration. Blow several bubbles, and tell your friends which bubble will pop first. Watch their amazement! |
| Behind the magic: The bubble wall becomes thinner before it pops. Less light is being reflected, so a black band forms on top of the bubble right before it pops. |
- Place some bubble solution into a saucer. Have a glass of water nearby.
- Place the end of a drinking straw into the solution, and blow a big bubble.
- Now brag to your friends that you can stick your straw into the bubble without popping it! Magician’s secret: While you are talking, dip your straw in the water, without letting your friends see!
- Carefully poke your wet straw into the center of the bubble. It won’t pop!
- Now ask for a friend to try the magic. Blow another big bubble, but give your friend a dry straw. The bubble will break immediately!
Behind the magic: The straw must be wet. Dry objects pop bubbles!

- Cut off both ends of a quart-size milk carton. This will be your bubble wand.
- Ask your friends what shape your bubble will be. They will probably guess “square!”
- Dip one end of the carton into the bubble solution, and gently blow into the other end. Watch your friends’ surprise when they see a round bubble!
Behind the magic: All bubbles are round, regardless of the shape of the bubble maker. They try to pull themselves into the shape that has the smallest surface area, which is a sphere.
![]()
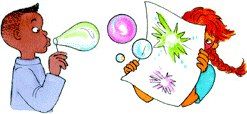 |
For the beginner bubble blower This art project works best when two people |
Materials needed: Tempera or poster paint in 3 or 4 colors, White or light-colored construction paper, Bubble solution, Bubble wand or drinking straw, 3 or 4 small containers, A teaspoon and cup
- This is fun, but can be messy! Spread newspaper around the area and wear an old T-shirt.
- Pour about one cup of bubble solution in each container. Add one teaspoon of paint to each container. Stir gently until mixed.
- Take turns blowing bubbles while your partner “catches” them on paper. As they break, you’ll get a design of brightly colored splotches! For darker colors, add more paint.
 |
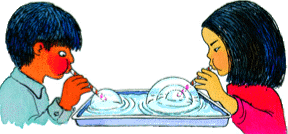 |
For the intermediate bubble blower
Materials needed: Drinking straws - Shallow tray - Bubble solution
![]() Fill the bottom of the tray with about ¼-inch of bubble solution.
Fill the bottom of the tray with about ¼-inch of bubble solution.
Dip one end of the straw in the solution. Hold the straw slightly above the surface and gently blow a bubble.
To blow bubbles within bubbles:
Remove your straw from the bubble. Make sure the straw is wet and then gently insert it in the top of the bubble, so it enters at a 45° angle. Blow gently to form another bubble. Repeat to form more bubbles in bubbles!
![]()
Print out page to play the game.
“I am air or gas, trapped in a liquid ball. What am I?”
Follow the path of each letter to discover the answer.


Print out page to play the game.
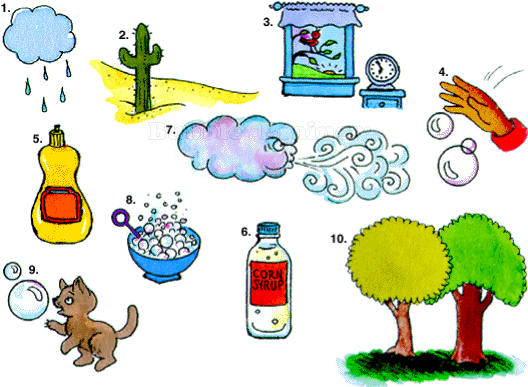
Find five Bubble Boosters; circle in red. Find five Bubble Blasters;
circle these in blue. Bubble Boosters are those things that help make bigger, better bubbles.
Bubble Blasters are enemies of bubbles.

|
For the beginner bubble blower Materials needed:
|
|
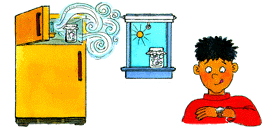 |
How does temperature affect the life of a bubble? Materials needed: |
Answer: Bubbles last longer in cool temperatures. Heat makes them evaporate faster. |
![]()
|
Bubbles, Bubbles all around -
Both big and small ones to be found!
Some offer fun and tricks for you,
While others have their jobs to do!
The bubbles that you blow up high
Can catch a breeze and almost fly!
With bubble tricks you'll be the best
And show your skills to all the rest!
Detergent bubbles can get mean
To get your clothes and dishes clean.
their power comes from plants or oil -
They do their job to bust your soil!
It's true that bubbles can be fun
But then, when all their work is done
It's down the drain to meet their fate
And Poof! They just evaporate!
|